In my previous post I have shown you how I cut out my
hardanger ornaments, let's now continue with the lining and sewing the ornament together:
I love using satin to line hardanger pillows and ornaments for the way it shines through and emphasizes the woven parts. And red satin for Christmas tree ornaments is just perfect, don't you think? I also pull the stitches of my Algerian eyelets so tight for the red to shine through those, too.
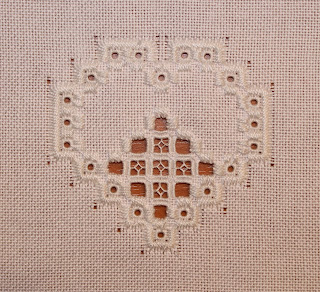
The two sides of the ornament have been embroidered and cut out. If needed, even washed and ironed, face down, between two white towels.
For the lining I cut two pieces of red satin, two pieces of Vliesofix fusible paperback web and one piece of batting. Well, not exactly batting as you know it: I am using a piece of a
white floor cleaning cloth, no laughing, please, it perfectly serves the purpose and it is new, of course.
To make the lining sandwich, I iron the Vliesofix pieces to the backs of the satin pieces, remove the paper backs and then iron the satin pieces to both sides of the "batting".
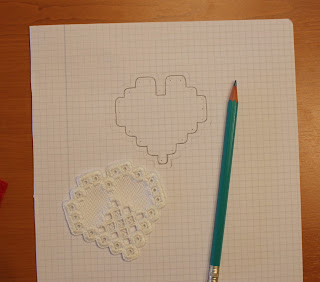
Then, I make a pattern to cut my lining sandwich into the shape of the hardanger pieces. I put one of them on a piece of paper and with a pencil I make markings through every Algerian eyelet and also trace lightly around the shape. I usually do this with a mechanical pencil to keep the embroidery clean.
Then, guided by the traced outline and the hole marks, I trace my pattern about 2-3 mm away from the hole marks. For each ornament I leave one set of holes free, with no lining under it, because that will be the hole where the ribbon will go.
I cut out my pattern and place it over the hardanger piece, to make sure that it covers all the Algerian eyelets (except the one left for the ribbon) but it isn't going over the bottom half of the buttonhole stitches, either. If necessary, I adjust the pattern.
Then, using the pattern I cut the lining sandwich into shape,
and check the size again. I place the lining on the back of one of the hardanger pieces,
and than place the other hardanger piece on top, face up, of course. I make sure that all three layers are in place, hold them together
and whip stitch the hardanger pieces together by going through the corresponding loops of every buttonhole stitch with DMC perlé no.12.
Mission accomplished:
To finish, I pull some red ribbon through the holes I have left without lining, tie a bow and my ornament is ready for Christmas, or any other occasion :)
I really hope that you have enjoyed the
Hardanger Christmas Ornaments series and that you have found this tutorial helpful.


.jpg)

%2B(650x228).jpg)


.jpg)


